


Look at it.
Just look at it.
In all its perfection and crusty top and moist interior and sourdough-y taste and and and.
This made the long journey worth the wait.
The other day I shared part 1 of my Journey to Sourdough with you (http://richlerrecipes.blogspot.com/2015/07/my-journey-to-sourdough-part-1.html), and I left you with a photo of my starter. Before we move on, I want to share with you the measurements for the preparation of the starter.
But before we do anything, I need to tell you which tools you need to prepare this bread.
1) A dough scraper (if you can't find something officially called a dough scraper, ask for a pot scraper - and just remember to never use it on pots!). These scrapers cost ~$1.

2) A dough cutter (about $5, this one is Kitchen Aid brand).

3) A kitchen scale, digital is good (prices vary - I think I paid about $20 for this one, and it's President's Choice brand).

4) A thermometer (no more than a couple of bucks).

5) Several bowls of varying sizes (if you're a baker, you have these on hand. Clear glass is good so you can see your starter working.).
6) A Dutch oven, or le Creuset pot with a lid (the whole thing has to be able to go into the oven at a very high temperature). The pots I used are Creuset and you can see the lids in the background in this photo below.

7) Patience. This has to come from inside - dig deep. From start to your first loaf of bread is ~ 10 days.
Now we're ready to talk about your starter.
Before you mix the starter, you need to put together a mix of flours - Chad Robertson recommends 1,000 grams of white bread flour and 1,000 grams of whole wheat flour. I used all purpose flour and whole wheat flour. I mixed it all together and then stored it in a large Tupperware container.
The Starter
water
50/50 mix flour
Take a small, clear bowl and fill it halfway with lukewarm water. Then take a handful or so of flour and toss it in. Mix it with your fingers. You really want to feel the consistency of your starter at every phase - it helps you learn when the starter is ready to feed, or ready to rest, or ready to make into the leaven. It also feels nice and squishy and it's kind of fun to play around with it. I heard from Beth (my sourdough mentor) that some folks believe if you touch stainless steel off your starter, the starter will die. That's reason enough to use your fingers! Why let it die before it even starts??
So this is what the starter looks like after you mix the flour and water.

Once it's mixed, cover it with a clean cloth and put it somewhere cool and dark for 2-3 days. During this first 2-3 days, I visited my starter often to see how it was doing, and what it smelled and looked like. When I noticed some bubbles around the edges on day 3, I knew it was time for a feeding. Just so I could fully understand what the properties of the starter should be when it's ready, I smelled it. It was a little bit like smelly cheese, or smelly feet maybe.
The photo below is my starter when it was ready for the first feed.

Chad Robertson notes at this point there may be a dark crust on the starter. This didn't happen to me but if it does, you just leave it there.
The First Feed
You feed your starter with more of the 50/50 flour blend and more water. Before you feed, you must pour out about 80% of your starter. I know this sounds CRAZY. You just made this starter! Why would you just toss it out? Get over it. It's just flour and water after all.
So before you toss out the 80%, give it a stir with your fingers. Feel the consistency. Smell it again.

Now pour out ~80%.

Now add some water. In the beginning, I was adding about 1/2 cup of water and then enough flour to bring it to an oatmeal-like consistency (gooey oatmeal, rather than chewy oatmeal - a 'slurry', as Erin refers to it in her book). Beth later told me that I really only need to add a couple of tablespoons of water and flour, because you end up tossing it out anyway and if you bake regularly, you'll end up wasting a lot of flour.
After you add the water, add some flour.


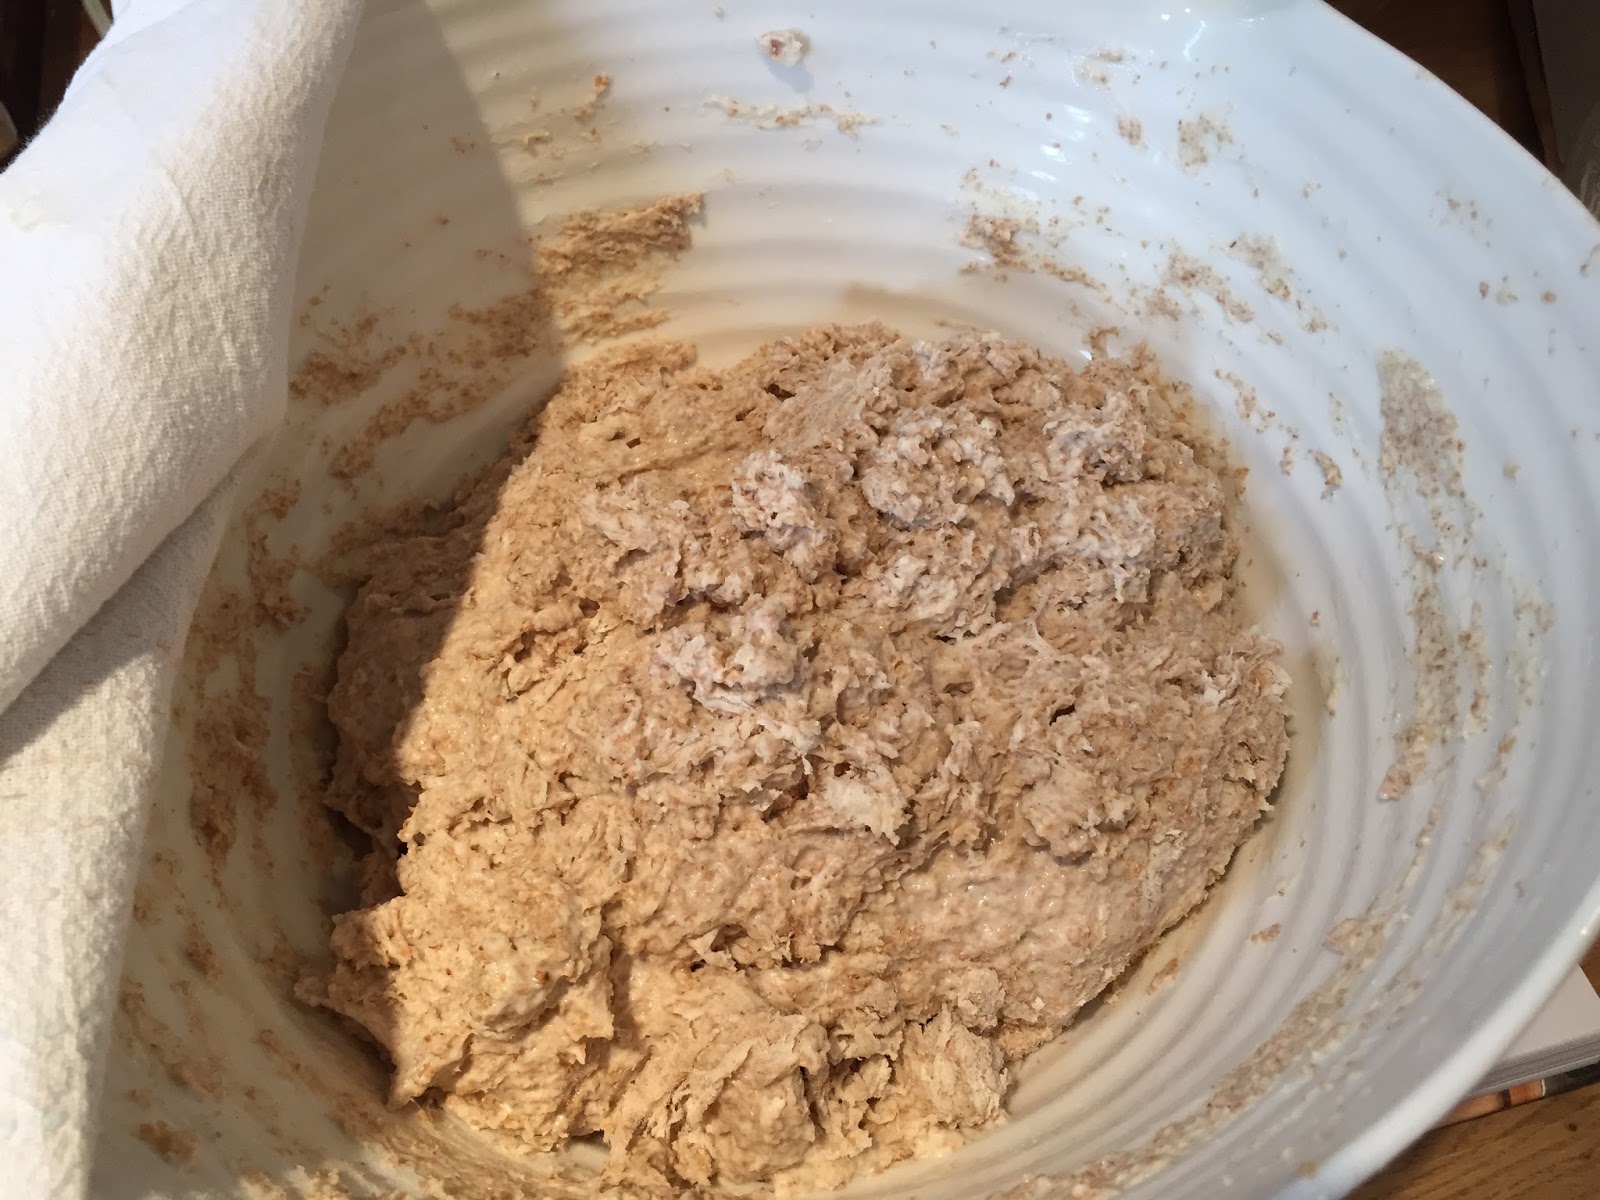
So at this point I decided it wasn't thick enough (see below).

So I added more flour and stirred again until it felt like oatmeal (Chad calls this a 'thick batter').


Then I covered the bowl and took it back down to the basement. But before I left it down there for 24 hours of simmering, I smelled it. After the feed it should smell sweet. It did!

See you soon, little culture.
So here is what you're trying to do. You're trying to feed the culture every 24 hours, hopefully in the morning each time to be consistent. You're looking for the culture to be slightly acidic smelling in the morning, and then slightly sweet after you feed it. If you check on it halfway through the day and tilt the bowl, it might look like melted cheese. This is good.
You are slowly turning your culture into a starter. Way to go!

This is the starter halfway through the day when I checked on it.
After you feed the starter, the volume will increase and you will see bubbles. After the food is 'eaten', the volume subsides. What is happening is that the yeast and bacteria are balancing.
The way you know if the starter is ready to make into leaven is when the rising and falling are happening predictably. This takes approximately 7-9 days from preparing the initial starter, to it being ready to turn into a leaven.
My photos of each day are pretty much the same and I don't want to bore you. But I will show you a photo of what it looked like the morning I decided that I should make the leaven that night (you feed in the morning and then the day before you want to bake, you prepare the leaven at night).

I want to reassure you that anyone can make this bread. You just need patience, and an entire day to turn the dough, shape the dough, let the dough rise, and bake the dough into bread. The first loaves I made were on a Saturday when I knew I'd be home. I made the leaven on the Friday night. Here's how it goes (or how it went)…
The Leaven
You make the leaven the night before you want to bake. Some recipes say that the day before baking you should feed the starter three times, some don't say to do that. I didn't. I fed the starter in the morning, as usual, then that night after supper I retrieved the starter from the basement cool spot and prepared the leaven.
Discard all but 1 tablespoon of the starter (thankfully, I didn't do this…more on this later***). Put that 1 tablespoon of starter into a medium-sized bowl.

This time when you add your water and flour you have to weigh both ingredients, and you have to take the temperature of the water.
Weigh 200 g of water. The water should be 78 degrees F.

Now measure the flour. You need 200 g of the 50/50 blend.

Pour the warm water into the bowl containing the starter and mix it together with your fingers to disperse the starter.

Now add the flour and mix again (using your fingers).


The leaven mix will be lumpy and very thick. It's ready to be covered and returned to the cool spot until morning when you're ready to make your sourdough.

I hope you'll be able to sleep tonight - it's very exciting to think that in less than 24 hours you will have two loaves of homemade, beautiful, tasty sourdough bread coming out of your very own oven!
The Sourdough - The Time is Now
Good morning! It's time to make some sourdough.
Retrieve your leaven from the cool spot. When you look at your leaven in the morning, it will have increased in volume by about 20%, and it will smell sweet like an over-ripe fruit. Erin says in her book that if it smells like bananas, you're in a sweet spot.
Note: mine didn't smell like bananas, but it definitely smelled like over-ripe fruit, and kind of boozy (in a good way).

The definitive way to tell if the leaven is ready to go is to take a little blob (that is the technical term) and drop it into a glass of water. If it floats, you're ready to rock and roll. If it doesn't float, you can cover the leaven again and put it in a warm place for 1/2 hour or so. Check it again. Keep doing this until it's ready.

It floats!
Measure 200 g of leaven. The leaven is like stringy, melted cheese and is hard to measure accurately. If there is a bit more than 200 g, that's totally cool. Just don't have less than a tablespoon. (Erin says you can have as much as 50 g more leaven and all will still be ok.)
Don't throw the rest of the leaven away!!! You need it to be your next starter. To do this, take a tablespoon of the leaven and put it in a small bowl. Feed it as you would a starter. This is your new starter. Put it back in the cool place and rejoice.

Measure 700 g of 80 degree F water.

Pour the water and leaven into a large bowl and mix it together with your fingers.


Measure 900 g of white flour and 100 g of whole wheat flour and pour it into the bowl with the water and leaven. Mix with your hands.


Once all the flour is incorporated, cover the bowl and let the dough rest for 25-40 minutes. I went for the full 40.
A Funny Thing Happened On the Way to the Sourdough
Here is the part of the story where I come clean and tell you about the mistake I made. Here goes…
As I was measuring my 900 g of white flour and my 100 g of whole wheat flour, I was day dreaming about eating the sourdough right out of the oven, with butter melting into each and every air pocket. As I was mixing the flour in to the water I noticed that it was pretty dark in colour. Then it hit me. I measured 900 g of whole wheat flour and 100 g of white flour. The exact opposite of what I was supposed to do. Dang.
I decided to persevere!
I continued mixing and then put the dough to the side to rest.
Starting Again
Then I started again. 200 g leaven, 900 g WHITE flour, 100 g WHOLE WHEAT flour. Measure, weigh, pour, mix, put to the side to rest.
***This is where it becomes important that I hadn't tossed the rest of the starter at the beginning. I ended up using all of the leaven and had none left to use as my starter. Thankfully I had the starter so I just continued to feed it and was able to use it again yesterday.
I now had four loaves worth of dough resting. I figured the whole wheat wouldn't work (because I had skipped ahead in Chad's Tartine book and read his recipe for whole wheat sourdough and it wasn't what I had done). Oh well, lesson learned. I decided to keep going so I could tell you all about what happened to the mix at the end of the day.
Here is a photo of the white dough resting.

The Salt and the Water
After 40 minutes of resting, it's time to add some salt and a little more water.
Weigh 20 g of salt and 50 g of warm water.


Sprinkle the salt and water onto the dough, and work the ingredients through the dough by squeezing it through your hands and fingers until you feel it has dispersed as evenly as possible. The dough will seem to separate at first but then it will come back together (it will look lumpy).


If you want to transfer your door to a fresh and clean bowl now, you can do this. This photo below is the white dough in a fresh bowl. This is the bowl that you are going to use to 'turn' your dough.

This turning is a Tartine method and basically completely eliminates the kneading process. Erin kneads her sourdough, but I liked the idea of no kneading so I decided to commit to the Tartine recipe from this point forward.
Let the dough rise in the bowl for 1/2 hour. I covered the bowl with a tea towel while it was rising. This is the beginning of the first rise process, Chad calls it the bulk fermentation or bulk rise. The bulk rise will take three to four hours if the environment is 78 degrees F to 82 degrees F. I gave my bread the full four hours and the house was slightly cooler (perhaps 74 degrees).
During the bulk fermentation process, you must turn the dough every 1/2 hour. To turn the dough you first wet your hand with water (to prevent the dough from sticking), and then stick your hand down the side of the bowl lifting the dough with your hand and folding it onto itself. Turn the bowl and do it again. And again. (Total of three times.)
Cover the bowl again and wait another 1/2 hour. To ensure I wasn't losing my place (because I had two bowls going and the timing was different), I made myself a little checklist for each bowl and used a timer. Each time I turned the dough, I checked one of the 1/2 hour boxes I had drawn on my checklist. I also used a timer for each bowl. The first series of turns is shown in the photos below.


The white dough looked very different from the whole wheat dough. The whole wheat dough was heavy and more solid. The white dough was soft and stretchier. Below are some photos of the first series of turns of the white dough, just so you can compare.


Perform three turns of the dough every 1/2 hour for three to four hours. Again, I did the full four.
Now you're ready to form the loaves.
The Loaves
Here is what the white dough looked like after 4 hours of turning. Puffy, light, spongy, perfect.

Pour the dough onto the work surface. Don't put flour down first. The idea here is to use as little flour as possible while forming the initial rounds.

When the dough is on the work surface, then you can lightly dust the top of the round with flour.

Use your dough cutter to cut the round into two semi circles.

Then use the dough cutter to help you flip each semi circle over so the floured side is down on the work surface.


Once they are both flipped over, use the dough cutter again to fold the semi circle over onto itself so that the un-floured sides are touching each other.


Now you are ready to do the initial shaping.
The Initial Shaping
This part is kind of difficult to describe. Basically you use the dough cutter to help you turn the dough in circles and tuck it into itself, until it's in a nice, round ball-like shape. As you turn the package, part of the dough kind of sticks to the work surface so you are creating tension in each dough ball. At the end you want a nice taut package of dough.


It's kind of like yoga for sourdough. You stretch the dough, turn the dough, create tension in the dough, then let it rest. Kind of like the energetic solar phase of yoga followed by the relaxing lunar phase.
It's time for your packages of dough to rest for 20 to 30 minutes. Below you see the two white packages on the left and the two whole wheat ones on the right. I covered these with dry tea towels and let them rest for the full 30 minutes.

The Final Shaping
It's time!!! Time for the final shaping which means we are one step closer to baking our sourdough. First, let's make a mix of flour that will prevent the loaves from sticking to the bowl and to the tea towel - take a handful of white rice flour and a handful of whole wheat or white flour and mix it together in a bowl.


Line a bowl or a bread basket with a tea towel and dust the towel with the flour mixture.


Now move your focus back to the beautiful round of bread that has been resting on the counter. Let's take a closer look.
If the sides of the rounds appear to be dripping onto the counter, like a clock in a Van Gogh painting, the round doesn't have enough tension in it. Reshape it and let it rest for another 20 minutes.
However, if the round looks like the photos below, flattened slightly but a consistent thickness all around, you're ready to form your loaf.

Use the dough cutter to flip the dough over so the floured side is on the counter.

We're ready to shape. Shaping is accomplished by stretching and folding the dough onto itself. There are four folds in total.
Fold #1: pull the bottom of the round (the part closest to you) toward you and fold it over on itself away from you.


Fold #2: using both hands, grasp the right and left side of the dough and pull. Take the right side and fold it toward the left.


Fold #3: do the same with the left side

Fold #4: pull the top of the dough away from you and then fold it back onto itself toward you


Pinch the seams together.

Roll the package away from you, forcing the seams to the bottom of the package.


Pick up the beautiful ball of dough and place it into your prepared vessel (bowl or basket with the tea towel that has been floured).
I misread the instructions here - the dough package is supposed to be placed in the bowl or basket seam side up. I didn't do that. It wasn't an issue.


These beautiful packages will now rise for three to four house in a warm environment (75 - 80 degrees F). If you don't want to bake right away you can delay or retard the dough by placing the rounds in the fridge for up to 12 hours. The second time I made the bread (yesterday), I let the dough rise for one hour or so, and then popped them into to fridge so I could take Noah to his baseball game in Richmond Hill. Four hours later when we returned, I removed the loaves from the fridge and let them rise for another 3 hours before baking. It worked perfectly.
The Baking of the Loaves
Now is the time. About 20 minutes before you are ready to bake, place your Dutch ovens into your real oven at 500 degrees F. Leave them there for the 20 minutes while the oven heats up. Meanwhile, open the tea towel to view your risen dough. Dust the top of the dough with your rice flour mixture.

Remove the very hot pot from the oven (just take one out, and leave the lid in the oven). BE CAREFUL - don't burn your arms. Now pick up the dough ball by lifting the tea towel out of the bowl. Move toward the hot pot and flip the dough into the pot. I am showing you two photos of this action below.


Now it's time to score the top. Scoring the loaves allows the trapped gasses built up during fermentation, to escape during the baking process. If you don't score the loaves, your bread could explode into an odd shape in your oven, and you don't want that to happen after 10 days of hard work and patience!
Chad recommends using a razor blade implanted in a wooden splint. I didn't have one so for the first time I used a very sharp knife, the next time I used an Exacto blade. Yesterday, The King of Soup fashioned me a tool using a razor blade and a split chopstick. This was the best method, so I say listen to Chad.
I decided to do three cuts on the whole wheat loaves, and tried to mimic Chad's cuts (a square box) for the white loaves.

At this point, it's time to bake. Put the pot back into the oven and place the cover on the pot. Close the oven and reduce the heat to 450 degrees F. Obviously if you have more than one pot going you need to repeat the steps above for the other pot (loaf).
Bake the bread for 20 minutes then open the oven and remove the lids. BE CAREFUL because steam will have built up in the pots and you can really hurt yourself if this steam hits you in the face. The steam helps to provide a moist environment for the bread keeping the sourdough chewiness that is expected of this type of bread.
Once the lid is removed, place the pot back in the oven for another 20 minutes. You want a very strong, dark crust so if 40 minutes total doesn't do it, add a few more minutes. Be careful with this because you could burn the bottom (I did - but it wasn't that bad and I was able to improve the method with round 2).
After 40 minutes - remove the pots from the oven. Tilt the pots so the loaves fall out onto a cooling rack.


White on the left, whole wheat on the right.
Here's the King listening to the song.

I was going to tell you to wait until the loaves are completely cooled before cutting but I didn't wait. I couldn't wait! We cut into a whole wheat loaf and a white loaf right away to sample.


And here's the good news - even though I thought I screwed up with that whole wheat mess, it worked! It was delicious and sourdough-y and yummy and crusty. Noah preferred it to the white if you can believe it.
Note: If you are baking another two loaves, place the empty pots back into the oven and increase the heat to 500 again. Repeat the above steps.
Another Funny Thing Happened On the Way to the Sourdough
The second time I made sourdough (yesterday), I decided to do whole wheat according to Chad's actual recipe, and regular white. So again I had two bowls of dough going at once (thankfully this time I had them timed together).
But I still made a mistake. This time I completely forgot all about the salt. It wasn't until the turning was done that I realized I had forgotten. So I added it at that time, and the water. Mixed it in and let it go for an extra 1/2 hour. Then I followed all the shaping directions like normal.
The dough was much softer and looser and I was worried it wouldn't come out OK.
It did come out OK. It was perfect.
And Chad's whole wheat recipe (with more water and 700 g whole wheat flour plus 300 g white) was tastier than mine.
But I have to say, what I have learned with this process (I have made 8 loaves now) is that every step of the process is very forgiving. If you forget to feed the starter, you can feed it the next day. If you leave it for weeks in the back of the fridge, you can resurrect it (read Chad's or Erin's books for more details). If you use the wrong measurements, you can still have delicious bread. If you forget the salt and add it later, still good.
My kind of recipe, my kind of bread.

No comments:
Post a Comment