Showing posts with label dessert. Show all posts

Wednesday, February 11, 2015

Lemon Squares (adapted from Alice Medrich's recipe)


This blog post is in honour of my friend, Erica Stark. 

Erica left our world far too soon; she had things to do, plans to make, trips to take, sons and a husband to love. She left behind those sons, that husband, an extended family including her parents - all grieving their sudden and completely unexpected loss, and still in disbelief three months later. 

She also left behind a large circle of devastated friends. She left behind a community, still surprised by her daily absence in the school yard, still looking for her at meetings and events. This community was strong when she was here, and has strangely become stronger since that fateful day. This strength is one of the gifts Erica left for us.

Erica loved to cook and bake for her family and friends, and sometimes even for strangers. Another gift that she left for us was a collection of recipes she shared with various friends and members of the community. In the weeks after her death, people shared stories of Erica and more often than not, the story was centred around food, or involved someone loving a recipe that had been shared by Erica.

I posted an Erica Stark recipe many moons ago, it was for her Lemon Loaf, a favourite in her home and now in ours as well (http://richlerrecipes.blogspot.com/2013/02/favourite-lemon-loaf.html). This recipe for Lemon Squares is not an Erica recipe, but I know she would have loved it because it is lemon and we shared a fondness for a good, tart, and fresh dessert. It's for this reason that I dedicate this post to her.

I miss you, Erica. Bye for now.

Ingredients (my edits are in brackets)

Yield: 16 squares
Note that these are in no way healthy! ~170 calories and close to 7g of fat each if you follow Alice's measurements. Slightly less if you use mine.

Crust
8 tbsp butter
1/4 granulated sugar (I used 1/8 cup - Erica and I both liked to cut back on sugar in recipes as much as possible)
3/4 tsp vanilla extract (always use real vanilla)
1/8 tsp salt
1 cup all-purpose flour

Filling
1 cup + 2 tbsp sugar (I used 2/3 cup)
3 tbsp all-purpose flour
3 large eggs
1 1/2 tsp finely grated lemon zest (I used the grated rind of two lemons, which is more than 1 1/2 tsp)
1/2 cup strained fresh lemon juice (about two lemons)
2-3 tbsp powdered sugar, for dusting

Method:

Melt the butter in the microwave or in a pan on the stove. Remove from the heat and mix the sugar into the butter. Then add the vanilla and salt and stir again. Add the flour and mix until just incorporated. The mixture will appear crumbly in the bowl.


Line an 8" x 8" baking pan with either parchment paper or aluminum foil. Press the crust mixture into the pan evenly.


Bake at 350 F for 25-30 minutes, until the edges are golden brown.


While the crust is baking, prepare the filling.

Stir the flour and sugar together in your mixing bowl (I used my Kitchen Aid but you can also do this by hand).


Add the eggs and mix together on medium speed for about a minute.


Add the lemon zest and juice and mix again.


When the crust is ready, pull out the rack without removing the pan from the oven (I actually took mine out of the oven so I could take a photo - and they turned out just fine). Pour the lemon mix into the pan.


Turn the oven temperature down to 300 F and bake for 20-25 minutes, or until the centre is not jiggly anymore (this was 20 minutes in my oven).


Once completely cooled, lift the foil or parchment to release the large square from the oven and peel the foil/paper away from the edges.


Cut into 16 squares.


Put some powdered sugar into a strainer and dust on top of the squares.


These squares will keep in the fridge for 3 days. After three days they will still taste good but the crust will be a bit soggy. You will have to re-dust with powdered sugar before serving as the sugar will melt into the lemon in the fridge.


Perfect with a cup of tea. Enjoy!

Note: I believe it would be possible to make this recipe gluten-free if you were to replace the all-purpose flour with a gluten free flour mix.

http://www.todaysparent.com/blogs/on-our-minds/pedestrian-deaths-on-the-rise-what-parents-can-do/


Wednesday, May 28, 2014

Lime Coconut Squares


Hi There! It's been a while, I know. I just returned from an evening work event and the King of Soup and our progeny are out at a Marlies game - what better time to plop myself in front of the computer to crank out a few posts I've been meaning to get to.

In the summer of 2012, the King of Soup's sister got hitched to a really awesome dude that we are proud to call brother. Since that time, we've been waiting patiently for offspring. While we were waiting, the King's brother and his beautiful wife produced a perfect little one so that kept the pressure off the sister for a few months. As we were basking in the glory of being Auntie and Uncle (and Cousins) to the beautiful one, an amazing announcement was made - that there would soon be another one joining the party! That day is soon upon us and we are all very busy getting ready and excited for this day. Several weeks ago, my Mothers-in-Law hosted a lovely baby shower for the King's sister, and the King's Mother baked these very excellent Lime Coconut Squares. I have made them twice since then and now I have to stop because every time I make them, I eat them.

I came late to the lime-is-awesome-in-dessert party, having had a deep relationship with chocolate for quite some time. With regard to citrus, I always knew about Lemon Meringue Pie but was never a fan. Later, I discovered lemon could be made into many pleasing desserts (like Lemon Squares, Lemon Ice Cream, Lemon Pound Cake), and realized there was more to life than cocoa. I was first introduced to lime with Key Lime Pie in the late 90s at a pot luck lunch. My friend Paula made the pie and of course, I tried it because that's what you do at pot luck lunches. It was to die for. I requested the recipe and have been making it at least once a year ever since.

These squares take it up a notch due to my Mother in Law's brilliant adaptation of the recipe, which is to use ginger snaps instead of graham cracker crumbs in the crust. The recipe also calls for coconut, and anything with coconut and lime together is A-OK in my books.

For my version I decided to use half graham cracker crumbs and half ginger snap crumbs for the crust, because I do love graham crackers and didn't want to leave them out entirely. I think that using all ginger snaps provides a little more kick, but both versions were delicious, and I am sure that using all graham crackers would also be yummy. For next time, I might even add some fresh ginger into the crust. Just sayin'.

Without further ado, here is the recipe. My adaptations are in brackets, as always. The original source for this recipe is Canadian Living Magazine, and I thank my MiL for sharing it with me.

Ingredients:

CRUST
3/4 cup graham cracker crumbs (I used half graham cracker crumbs and half ginger snap crumbs, or you can use all ginger snap crumbs)
3/4 cup unsweetened shredded coconut, toasted
1/4 cup sugar (I cut this back to 1/8 cup, or half of a 1/4 cup measure)
1/3 cup butter, melted

CURD FILLING
1 can sweetened condensed milk (I used the "light" version - and take note, this stuff has an expiry date so make sure to check your can before pouring)
4 egg yolks
2 tbsp grated lime zest
2/3 cup freshly squeezed lime juice

Method:

To make the graham cracker/ginger snap crumbs, use a food processor and spin until crackers/cookies are finely ground.


In the photo above you can see the layer of ginger snaps on the bottom and the graham crackers on top of that.

To toast the coconut, place it into a frying pan and put the burner on medium heat. Watch it carefully as it will burn before you know it.


In a bowl, stir together the crumbs, coconut, sugar and butter.


Press the mixture into a parchment-lined 8 inch square pan.


Bake at 350 degrees F for 10 minutes and let cool on a rack.

While this is baking, zest and juice your limes. I think I used about 10 of them.


Then whisk together the sweetened condensed milk and the egg yolks. Add the lime zest and lime juice.


Pour into the baked crust.


Return it to the oven (still at 350 degrees F) and bake it for about 15 minutes, or until the edges are set and the centre still jiggles a little. Let cool completely on the rack.


Then put into the fridge for a full 12 hours. This way you will get a clean cut when you cut the squares.


These squares will keep in the fridge in an airtight container for a week. But who's kidding who? They won't last a day!

Makes 36 small squares and according to the Canadian Living site, each square is 83 calories, has 10 g of carbs, 2 g of protein, 5 g of fat, and 8 g of sugar. Remember that these counts are if you follow the original recipe to the letter. The site has a neat calculator so you can enter in the actual number of squares you got and see the calculation change. Here is the link: http://www.canadianliving.com/food/baking_and_desserts/lime_coconut_squares.php

Enjoy!

Thursday, February 21, 2013

Favourite Lemon Loaf


I wear many hats in my life and the most important one is being a good Mom to my two beautiful boys. As part of this responsibility, this year I volunteered to be the Class Rep for my youngest son’s classroom. I help out with sending messages to parents, and drumming up support for causes dear to the school (like putting together Christmas baskets for neighbours in need). 

My most recent assignment was to encourage parents to contribute to a themed class basket to be auctioned off at the Withrow Public School Silent Auction taking place on February 28 at the school. Our theme was “What’s for dessert?” which was right up my alley. 

I sent out the email request last week and the first person to respond was Erica, the Mom of my son’s friend Gavin. She contributed a lovely loaf pan and a “favourite lemon loaf recipe”. We are suckers for anything lemon-related in our house so I knew I’d be trying this recipe as soon as I could get my hands on a copy – I asked Erica to send it my way and we made it that very night. We weren’t disappointed.

As with any new recipe, sometimes you test it out and it doesn’t quite make the grade. This happened to me with my first attempt – this recipe calls for self-raising flour. I didn’t have any and I guess I was really tired and wasn't thinking clearly, so I decided to just use regular flour. I also cut back on the sugar and butter, as I usually do. I figured this was OK because Erica said that she did the same thing. The end result was a very dense, not very tall loaf – the flavour was fantastic though, and so we ate the entire thing. I am posting the photo of the flat loaf below, just to make you smile.


The kids (and The King of Soup) asked me to make it again so this time I used the trusty internet to find out how to make my own self-raising flour. Turns out it’s easy – you just add baking powder and salt and voila! You’re good to go.

The photos here are from the second attempt – you can see how light and fluffy the loaf looks in the photos. Just delish.

Below are the ingredients and instructions, with my notes and edits, as usual. Thanks Erica!

Ingredients:

Loaf
¾ cup unsalted butter (I used ½ cup salted butter and ¼ cup 0% fat Greek yogurt)
¾ cup sugar (I used ½ cup)
1 tbsp finely grated lemon zest (about the zest of one lemon)
3 eggs, lightly beaten
1 ½ cups self-raising flour (I used 1 ½ cups all purpose flour + 2 tsp baking powder + ½ tsp salt)
1 tsp lemon extract (the original recipe didn’t call for this but I thought it would give it an extra lemony burst, and it did)

Glaze
½ cup sugar (I used ¼ cup)
¼ cup freshly-squeezed lemon juice

Method:
Preheat oven to 325 degrees F. Spray a loaf tin (9x5 inches) with cooking spray and line the bottom of the pan with a rectangle of parchment paper (I didn’t use the parchment and everything turned out well).

In an electric mixer beat the butter, yogurt, sugar and lemon zest for 2 – 3 minutes until fluffy. 


Add the beaten eggs in three parts, alternating with a spoonful of the flour/baking powder/salt mix. Mix well after each addition then add in the remaining flour mixture and fold in until smooth.


Pour the batter (it’s thick) into the pan and smooth it out on top. 


Bake it for 50 – 60 minutes (it only took 45 in my oven) or until a toothpick or skewer inserted into the centre comes out clean. I would start checking at about 42 minutes or so. 

Turn the loaf out onto a wire rack, then flip it over so it is right side up. Take a skewer and poke a few tiny holes in the top, and then place the rack with the loaf on it on top of a plate. The tiny holes you make in the loaf will help it to soak up the lemon glaze you are about to pour on top.

Take ¼ cup of sugar and ¼ cup of freshly squeezed lemon juice and mix with a spoon just a couple of times – you don’t want the sugar to dissolve. Spoon the mixture (quickly) on top of the warm loaf. The juice will sink in and the sugar will form a crystal-like crunch on top. In the photos you can see the crystal-like sugar coating sparkling in the light.

You can serve it immediately, or it will keep (but not for long because it is so delicious). I recommend keeping the juice that drips onto the plate and spooning it over your slice for additional lemon burst. You can serve it with sliced strawberries, or any kind of berry, or raspberry jam. 

As an 'official' dessert, it should serve 8 people. As a loaf, nibbling away bit by bit, it could last for up to 5 hours. I'd be very surprised if it lasts for longer. Especially if there are kids in your house.


Tuesday, February 21, 2012

Apple Pie That Can Win A Contest


The King of Soup has another, lesser-known title: The Prince of Pie. A few years ago The Prince of Pie and I decided to have an apple pie bakeoff. This idea came as a result of a very successful visit to a local Ontario apple farm where we picked oodles of different types of apples. We thought it would be fun to try baking some pies with different kinds of apples in them to see which one tasted best.
The Prince of Pie has long been a braggart with regard to his pastry making skills. And I will admit that he does a good job. He gets very into his craft, refusing to use technology (a food processor) to help him, instead freezing his fingers over and over again in an ice water bath so as not to heat the pastry too much while mixing the ingredients. Me, not so much, I believe in using a Cuisinart all the way.
So we planned a dinner party and invited The Prince’s Mother and her spouse, as well as my own Mom. I don’t even remember what the meal was, just how competitive The Prince and I became in the kitchen with the pies.
At the end of the day, The Prince of Pie won the battle. He won for several reasons: 1) his pastry was flakier (I used all butter, he used all lard), 2) his filling was tarter (I used Honeycrisp apples and he used Spartan), and 3) his pie was prettier. As much as I like to believe I am not a sore loser, I was hurt. My own Mom voted against my pie (it was a blinded taste test, to be fair to both competitors and judges).
Later on, about a year later we had a rematch over lasagne. His was meat, mine vegetarian, and I won hands down (even the meat eaters preferred my lasagne). But I was still stinging from the pie battle. So last week we were expecting The Prince’s Mother and her spouse for dinner again. I decided to make a pie, just for fun (yeah, right!).
This time I decided to use half butter and half lard, because I believe the lard definitely makes the crust flaky, and the butter gives the crust a better taste. For the filling I used Granny Smith, a nice tart, firm apple. And I took some extra time to make it pretty, very pretty (I cut leaves out of pastry and everything!).
Well guess what? The Prince’s Mother, her spouse, and even The Prince himself all agreed it was one of the best, if not THE best apple pie they had ever tasted.
And it was.
The sweet scent of redemption smells not unlike an apple pie. MY apple pie.
Dvorah’s Apple Pie
For the crust (adapted from The Joy of Cooking):
Sift together: 2 cups all purpose flour and 1 tsp salt
Add 1/3 cup plus 1 tbsp chilled butter and 1/3 cup plus 1 tbsp lard (I use Tenderflake)
Cut the butter/lard into the flour mixture using a pastry blender, or use a food processor and pulse until mixture resembles pea-sized grains (this is what I did). You can also use your fingers to do this as described above in the story.
Then add 2 tbsp very cold water and pulse a few times until ingredients hold together. You may add 1 tsp more water if needed. You can wrap the dough in some plastic wrap and let it sit on the counter until you are ready to roll it out. Don't put it in the fridge because it will become too stiff.
Usually I take the easy way out and press the dough into the bottom of a springform pan, trying to build up the sides of the pie crust so it looks like a deep-dish crust. But this time, since I had a reputation to rebuild, I went all out and rolled my crust.


Roll out your pastry using a bit of flour on the rolling pin and a bit on the rolling surface – but not too much or your dough will be too stiff and will lose its’ flakiness.  In the photo below you can see that I used my pie plate to estimate the size that the dough needed to be to fill the plate.


Use the rolling pin to help you get the dough off of the counter and into the pie plate.


Yes, my bottom crust looks messy right now, but the great thing about pastry is that it is easy to repair (as long as it is not too dry). Patch it up with pieces of other dough – you don’t need to worry because no one will see the bottom crust.


Filling
5 – 6 cups apples (I used Granny Smith)
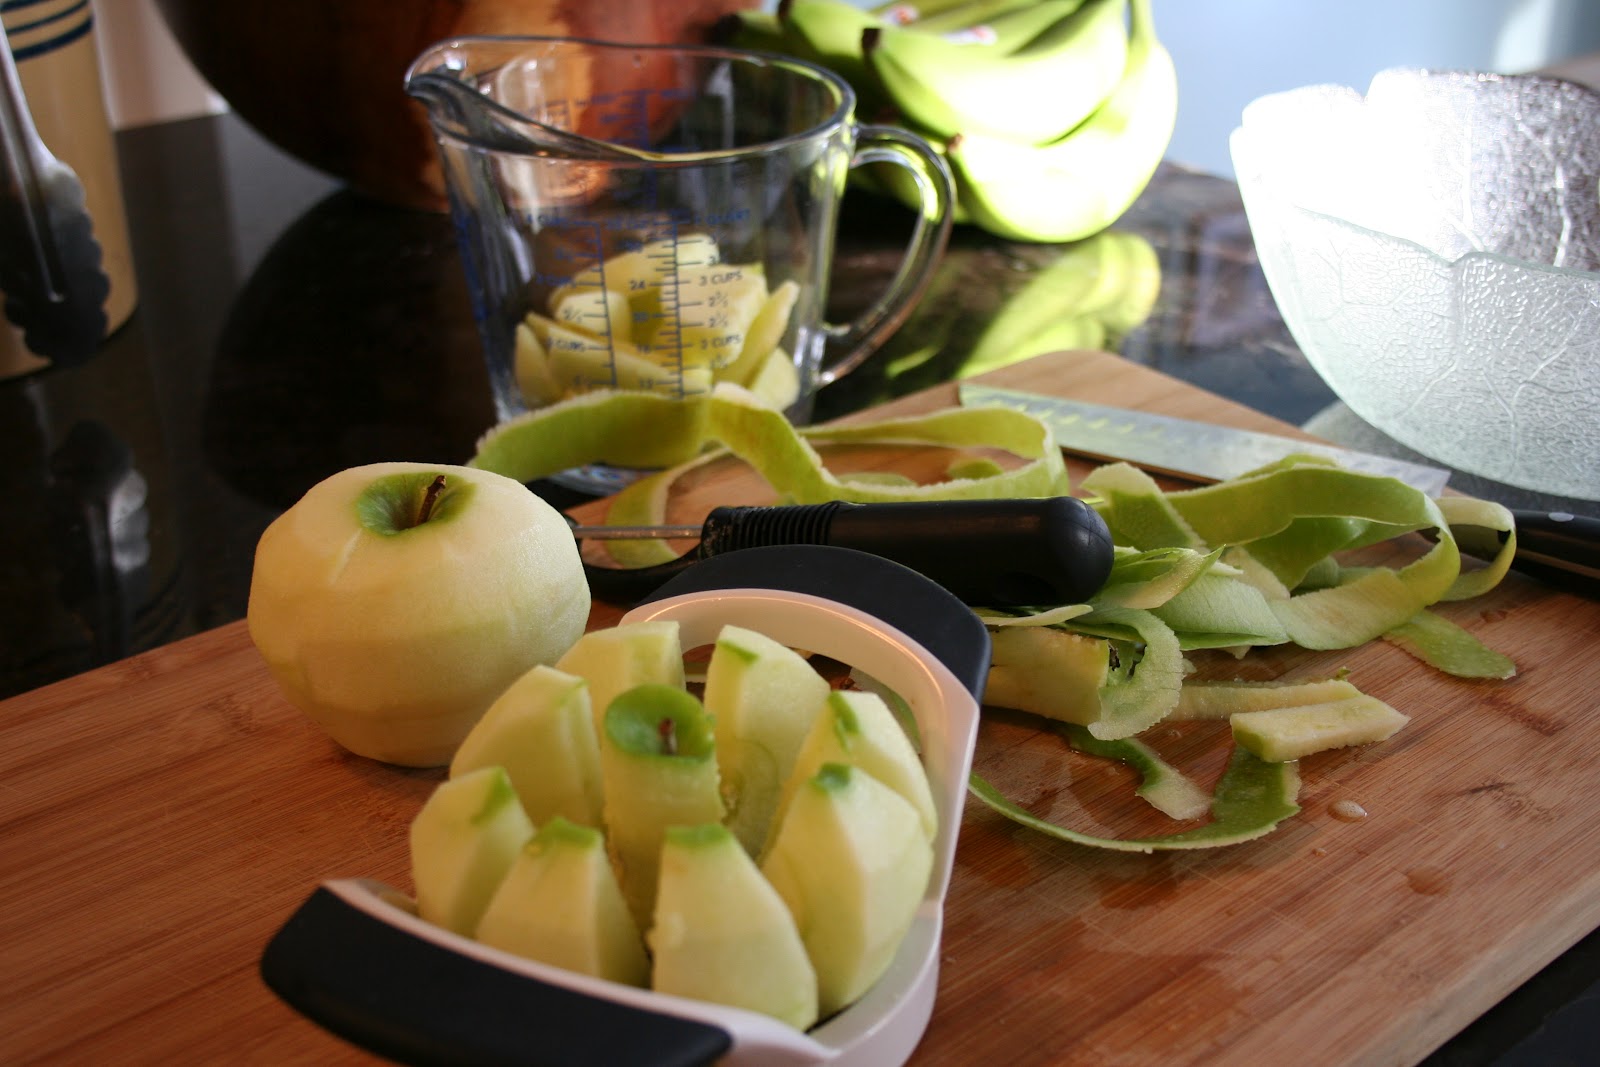
Peel the apples and core them. I use one of those nifty apple cutters that both cuts and cores at the same time. Then use a knife to cut each of those slices in half – that way the apples are all pretty much the same size. If you cut them too thin the filling will be mushy.


Taste the apples. If they are VERY tart, add 2/3 cup white or brown sugar. If they are VERY sweet only add ½ cup white or brown sugar. I used ¼ cup white and ¼ cup brown.
Also add 1/8 tsp salt and 1 to 1 ½ tbsp cornstarch (if apples are VERY juicy, use 1 ½ tbsp cornstarch, if apples are dry, as most Granny Smiths are, use only 1 tbsp).
Also add ¼ tsp cinnamon and 1/8 tsp nutmeg. Next time I might add some allspice and/or cloves as well.
If the apples are bland you can add 1 tbsp lemon juice or 1 tsp vanilla or ½ tsp grated lemon rind.

Mix the apples with all of these ingredients and then pour them into the pie plate that has the bottom layer of dough in it. Dot the apples with butter, then cover with the top layer of dough.


Trim the dough that is left hanging over the edge of the pie plate leaving ~1/3 inch overhang. Fold overhang under and use your fingers to make a fluted edge (you do this by pinching – see photo). Make sure you have a good thickness of dough on the fluted edge since it shrinks when it bakes.

 
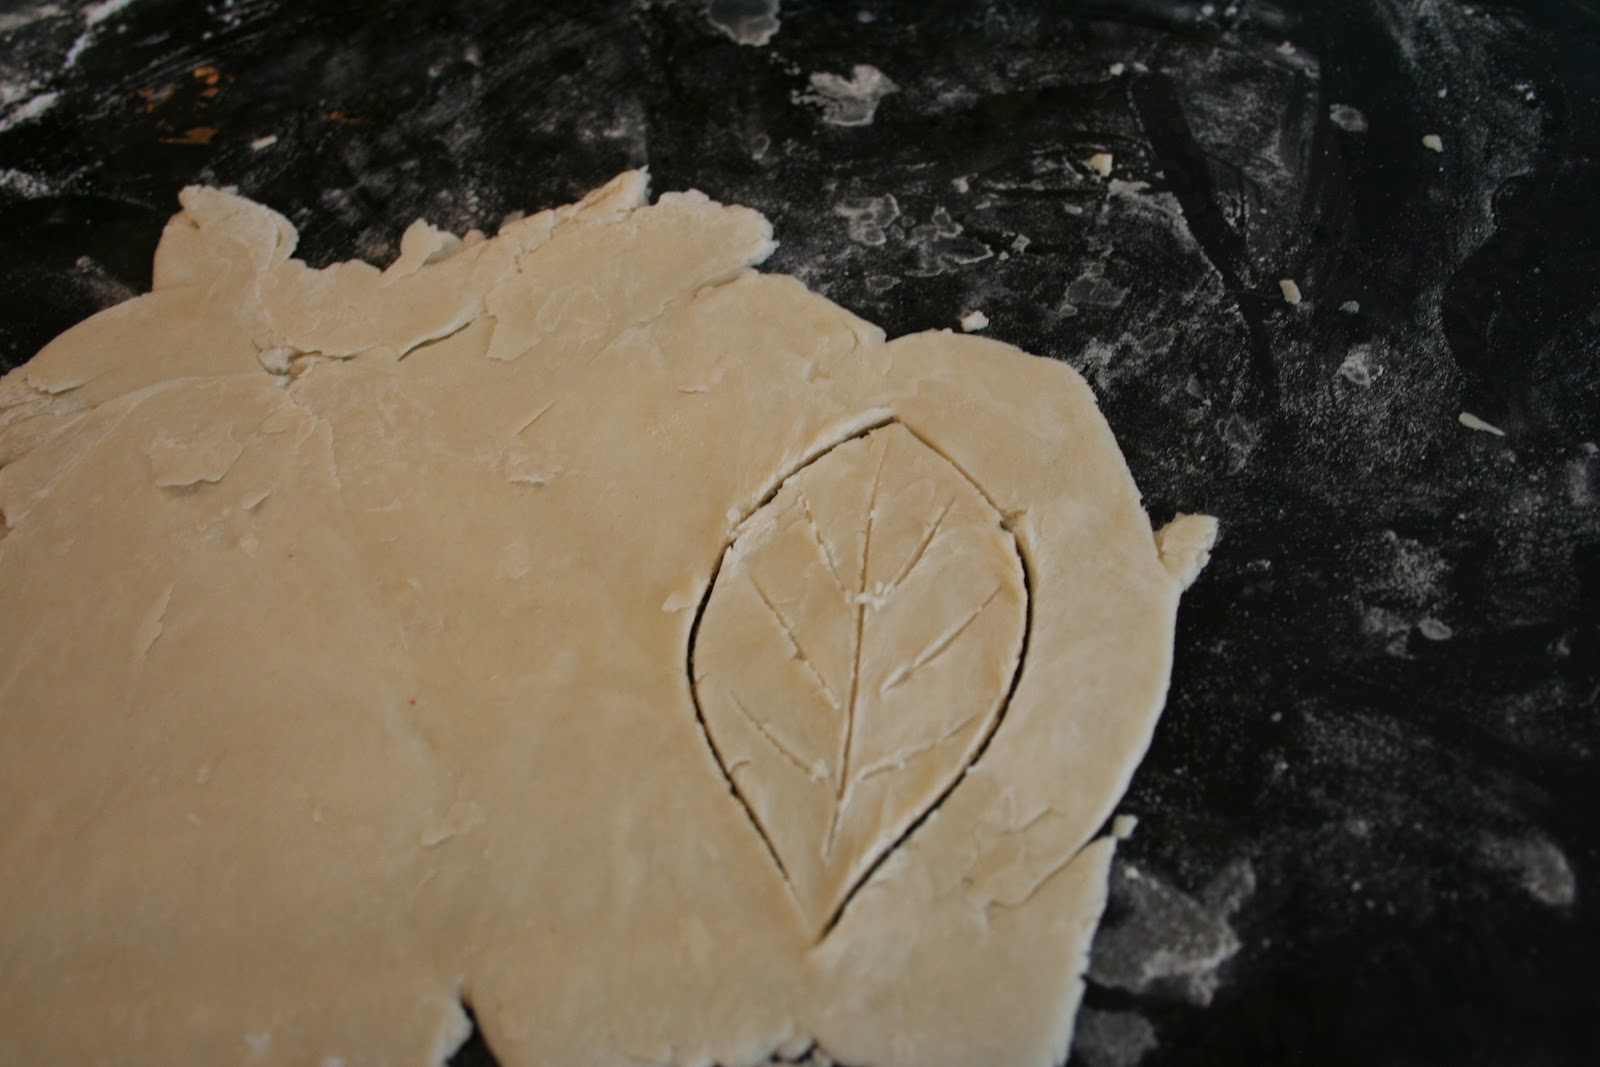
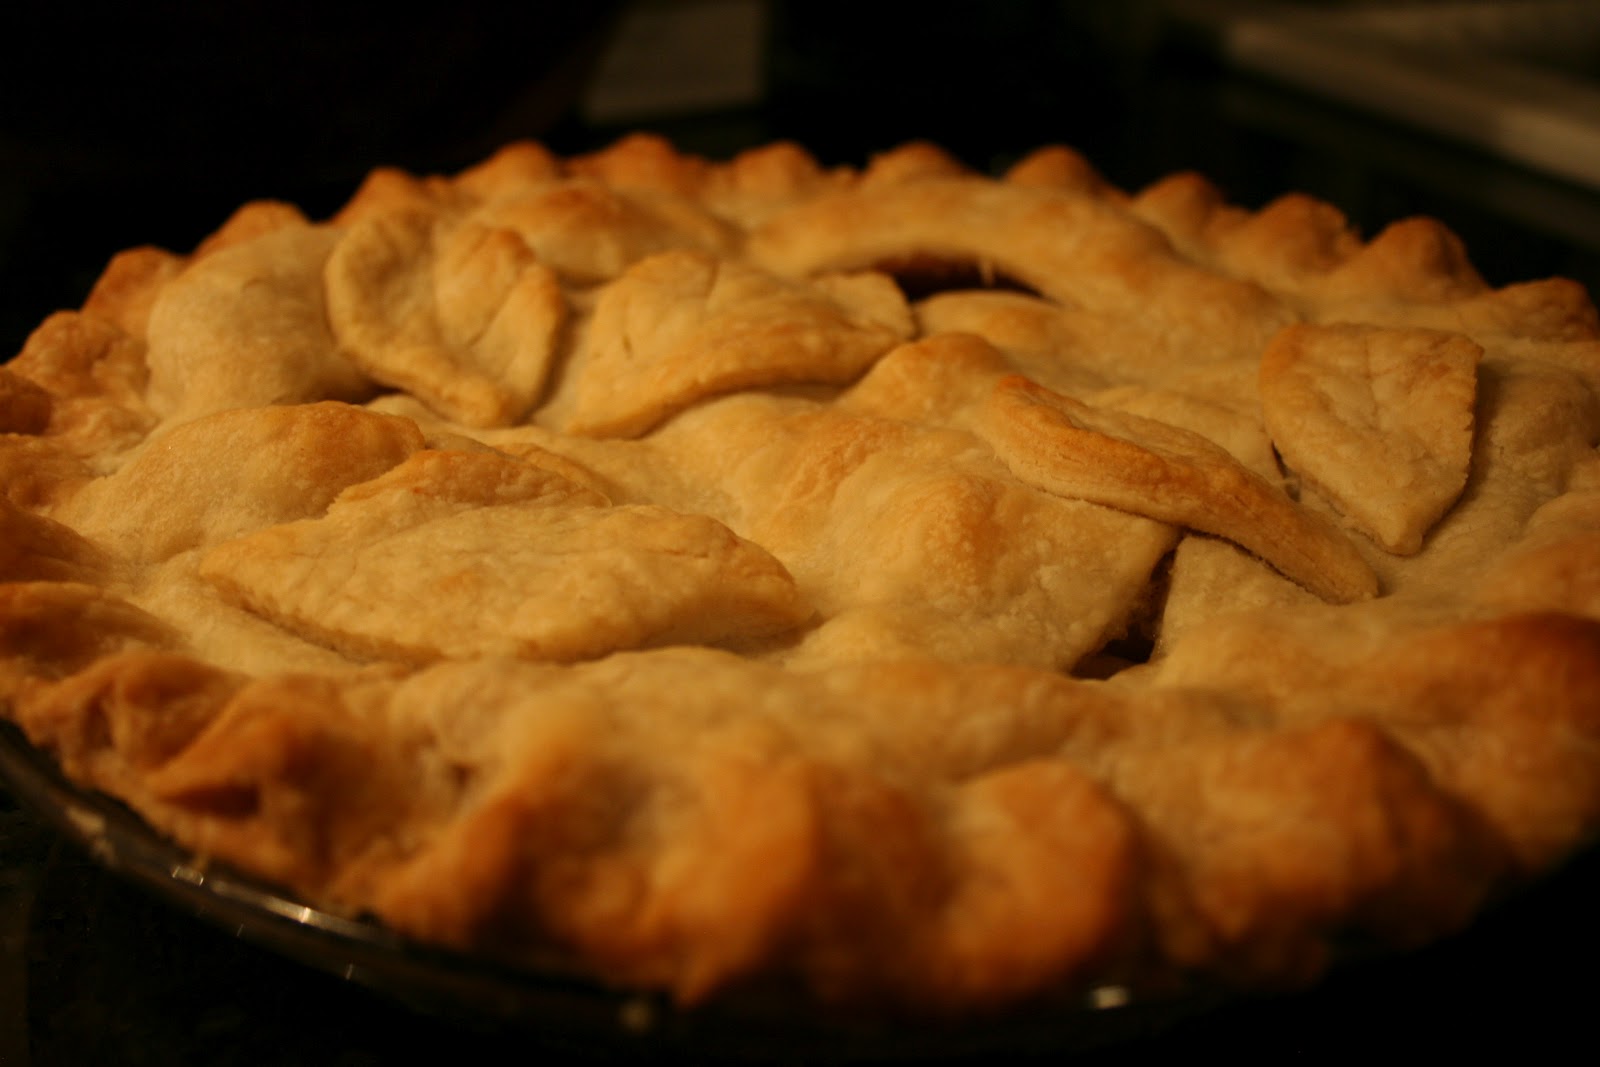
Use leftover dough to make some decorations if desired. I made leaves. They came out looking very pretty once the pie was baked.


Preheat the oven to 450 degrees F. You can either prick the top of the crust with a fork to make some holes for the steam to escape, or make some curvy slices in the crust like I did (see photo).
Bake the pie at 450 for 10 minutes and then reduce the heat to 350 and cook the pie for an additional 35 to 45 minutes. Keep an eye on it and if the crust looks too dark, you can lay a sheet of tin foil on top of it for the remainder of the cooking time. I baked it for 35 minutes because I knew I was going to reheat it later when it was time for dessert.


Serve with vanilla ice cream, or cheddar cheese, or just as it is. I promise you it will be delicious. Maybe even contest-worthy.